Adopting Colemak
A year ago, I reflected that my typing accuracy was lower than I wanted. I’d learnt to type autodidactically decades prior and had developed an idiosyncratic technique. My speed was satisfactory, but my consistency wasn’t, and I had to make regular corrections. Furthermore, I used my right hand to press keys on the left side of the keyboard, which meant my hands moved from side to side, which was tiring during long typing sessions.
To address this, I decided to learn proper touch typing technique. This also provided the opportunity to change keyboard layout from the conventional QWERTY layout, as I’d be relearning which finger to use to press each key anyway. I was aware of alternative layouts to QWERTY which offer to make typing more comfortable and efficient by reducing finger travel and awkward movements, and decided to adopt such a layout whilst learning proper technique.
Choosing a layout
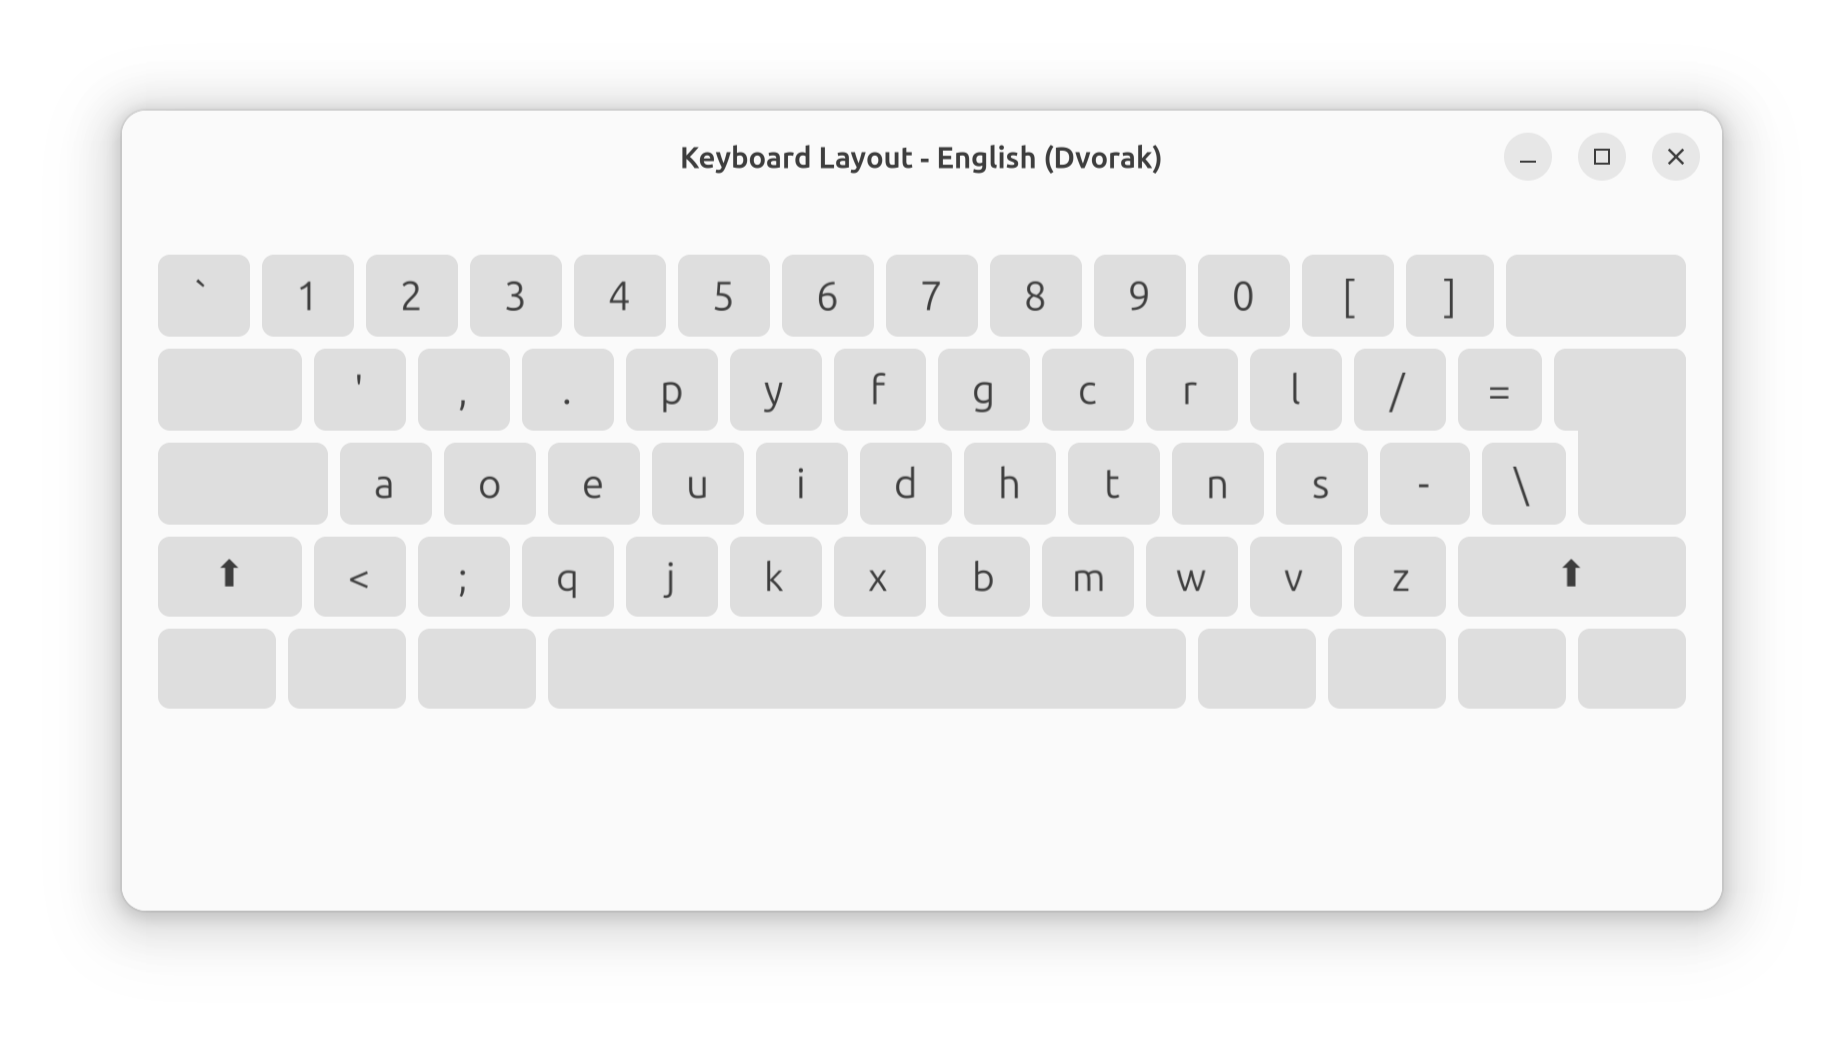
The two most common alternatives to QWERTY are Dvorak and Colemak. Dvorak is the older and more common of the two (though still rare compared to QWERTY), originating in 1936. Dvorak is designed to put the most common letters in English prose on the home row (the middle row of keys on which your fingers rest whilst not typing). The vowels are placed under the left hand, and the most common consonants under the right hand. Dvorak moves many of the non-alphanumeric keys away from their positions in QWERTY, as shown in the diagram below.

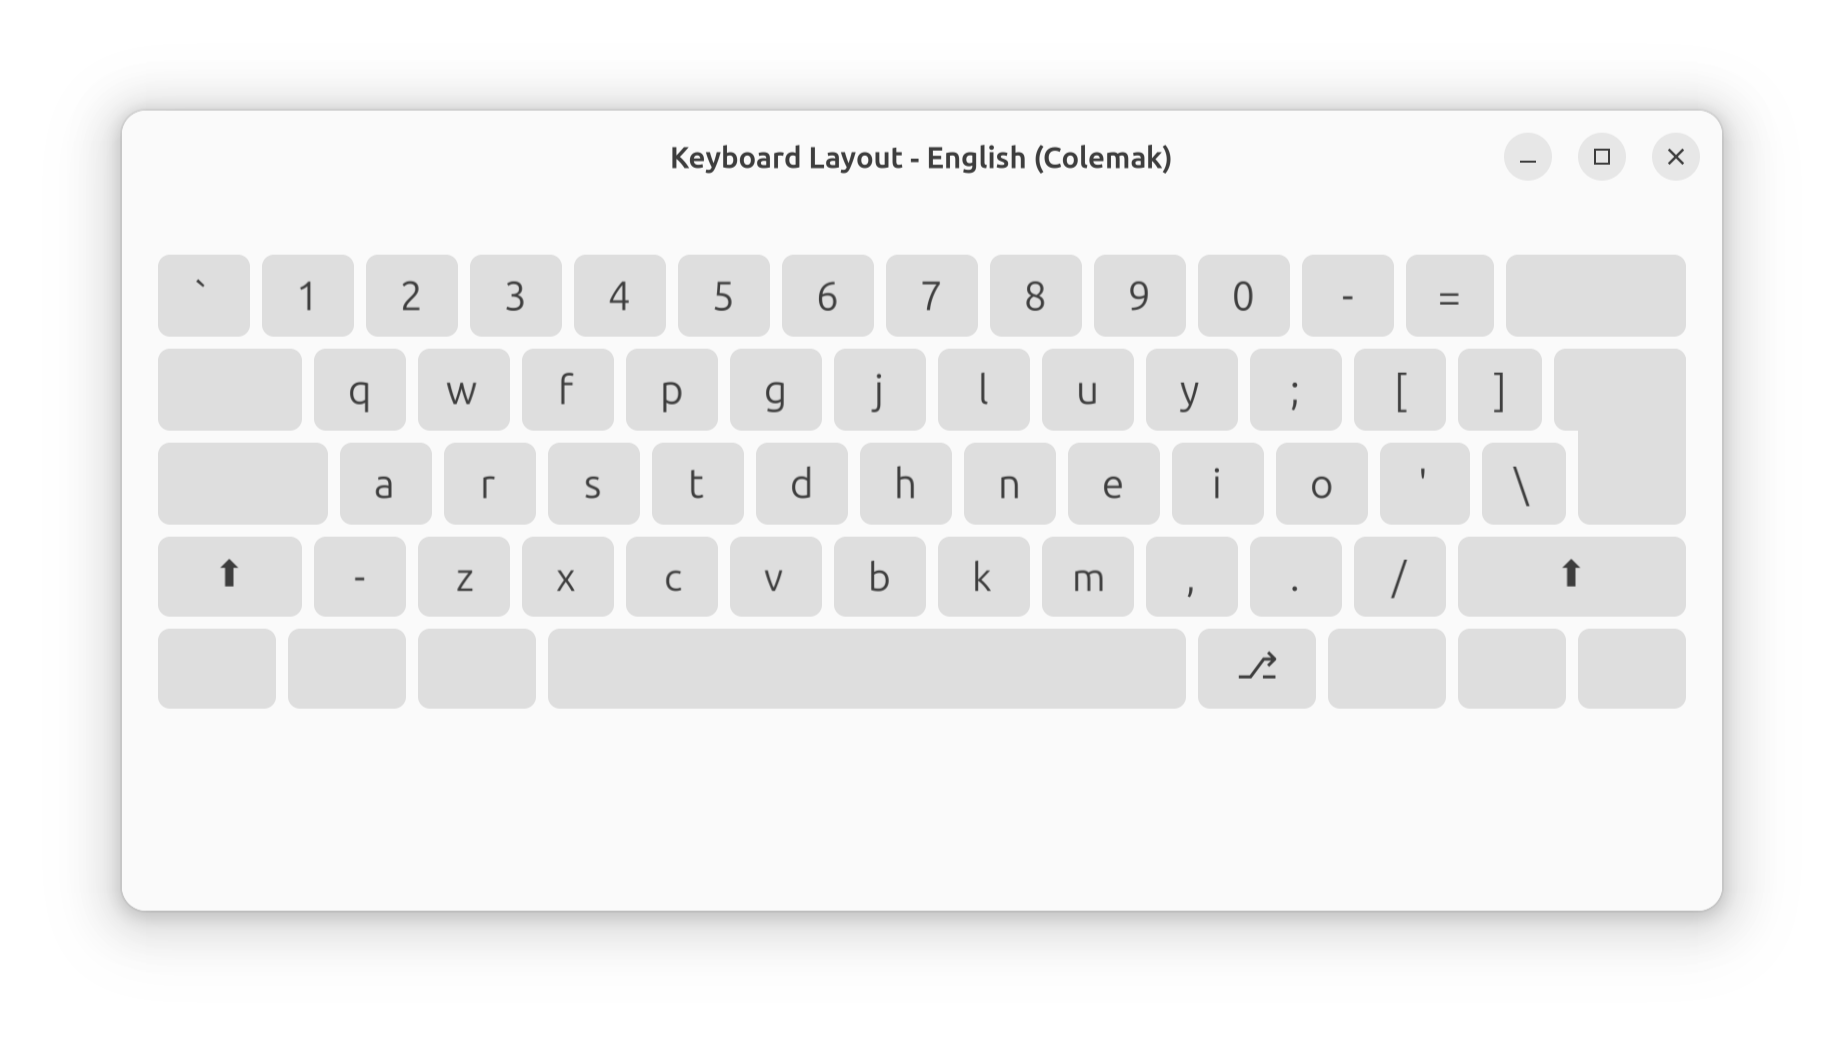
Colemak is much more recent, having been developed in 2006. It takes QWERTY as a base and maintains the position of most non-alphanumeric keys and the keys used in shortcuts for common operations such as undo, copy, and paste, as illustrated below. This reduces the learning curve compared to Dvorak, especially for programmers who type non-alphanumeric characters such as delimiters and punctuation regularly. The remaining alphanumeric keys are distributed so that common letters in English prose are placed on the home row, and frequent letter combinations are typed with alternating hands. It minimises the number of bigrams that require pressing consecutive keys with the same finger, which is slow.

Whilst Dvorak and Colemak are the most common alternative keyboard layouts, there’s a long tail of others such as Workman and Norman. Although these claim advantages over Dvorak and Colemak, the main benefits of an alternative layout come from having a purposely designed layout that isn’t QWERTY, so efficiency improvements from these other layouts are marginal, and there are other tradeoffs. This is demonstrated by the quantitative model of typing effort developed in the Carpalx project. Additionally, only Dvorak and Colemak are supported by the desktop operating systems I use regularly (Linux and macOS) without installing additional software or requiring administrator privileges.
From these two options, I chose Colemak for its closer similarity to QWERTY and statistical superiority over Dvorak. According to the Carpalx model, Colemak requires less effort than Dvorak, whilst making greater use of the home row and balancing keypresses more evenly between the hands.
The learning process
I became proficient with Colemak over a couple of months during daily half-hour sessions. I continued using QWERTY outside these sessions, so as not to compromise my productivity whilst reaching useful speed and accuracy with Colemak. To mitigate initial confusion from the different key placements in QWERTY and Colemak and build muscle memory, I used a different physical keyboard to practise.
As stated above, I didn’t change from QWERTY to become faster at typing but to improve my consistency and reduce fatigue, using all ten fingers and dropping the idiosyncratic habits I’d picked up. To achieve this, I learned Colemak in three stages: first, mastering key placements and finger assignments.
I practised key placements and finger assignment using Colemak Club, learning from a reference diagram from the Colemak website. Colemak Club breaks learning the key placements into seven levels, where the first level introduces the eight keys under the fingers on the home row, and once these are learnt consecutive levels introduce more columns and rows until by the final level you’ve learnt the position of every alphabetic key.
Once I’d learnt key placements and with which finger to press each key, I focused on developing consistency in hitting the correct keys, which I practised with keybr.com. Keybr.com generates random words to type, initially containing only a subset of letters. Once you demonstrate proficiency in typing these keys, additional letters are introduced. Per-key statistics such as accuracy and time to type are calculated, and based on this, new words are generated that oversample the keys that you type less quickly or accurately. This provides targeted practice, so you spend more time practising the keys you are the least proficient with.
Once you’ve reached a threshold speed and accuracy on every letter, the icons in keybr.com will all be coloured green. I achieved this around one month after starting to learn Colemak. At this point I switched to Colemak for all typing and ceased using QWERTY, having reached sufficient speed and accuracy for tasks such as taking notes during meetings.

I continued half-hour daily practice sessions, alongside using Colemak for all other typing. At this point, I wanted to practise typing real English words, to train myself on common n-grams and not just individual letters. For this, I used Monkeytype, which allows setting a minimum accuracy level, below which the session will be marked as failed and have to be repeated. I used this to focus on maintaining and improving accuracy, as per my initial goals, without achieving faster speed at the expense of accuracy. After a month of this practice alongside using Colemak full time, I was sufficiently proficient that I stopped the practice sessions.
Reflections
A year after learning proper touch typing technique and adopting Colemak, I’ve surpassed all my initial goals. Through deliberate practice over a couple of months, followed by continued daily use, I’ve exceeded the accuracy and consistency with which I could type in QWERTY. I use all 10 fingers, have dropped the bad habits developed when I originally learned to type, and my hands move less from side to side.

Additionally, whilst not motivated by increasing my typing speed, the efficiency improvements have led to faster typing. Overall, adopting Colemak was a beneficial investment of time, and I’d recommend this to others looking to improve their typing.